This method is specifically for cases where unit owners have signed their consent forms outside of the Consents Module.
NOTE: You can either upload the completed opt-in form OR enter the signing date to quickly enable the unit for online voting.
Step 1 - Access the Consents Module via Participation & Approvals: Start by navigating to the Participation & Approvals Module within your Power Admin account. You can do this by clicking on the "hand inserting a paper ballot" icon in the left-side menu options and selecting "CONSENTS."
Step 2 - Locate Active Consent Form: You should now see listed the active consent forms for your membership. Identify the Opt-in Consent Form for Online/Electronic Voting. 
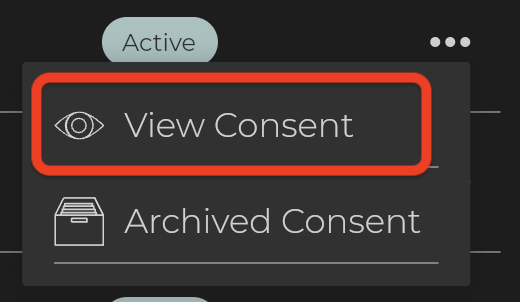
Click on the three dots icon next to the form, and from the dropdown menu, choose "View Consent." ➡️
Step 3 - Locate Unit Breakdown Tab: Scroll down and locate the Unit Breakdown tab and click to select it.
Step 4 - Search for Unit: Using the "Search by Unit feature, enter the unit number you wish to opt-in for online voting. As you enter the name, it should start populating and appear.
Step 5 - Select the three dots icon and select "Add Consent".
Step 6 - On this next screen, you have the option to select "UPLOAD DOCUMENT" which will allow you to upload the opt-in form from your computer files. 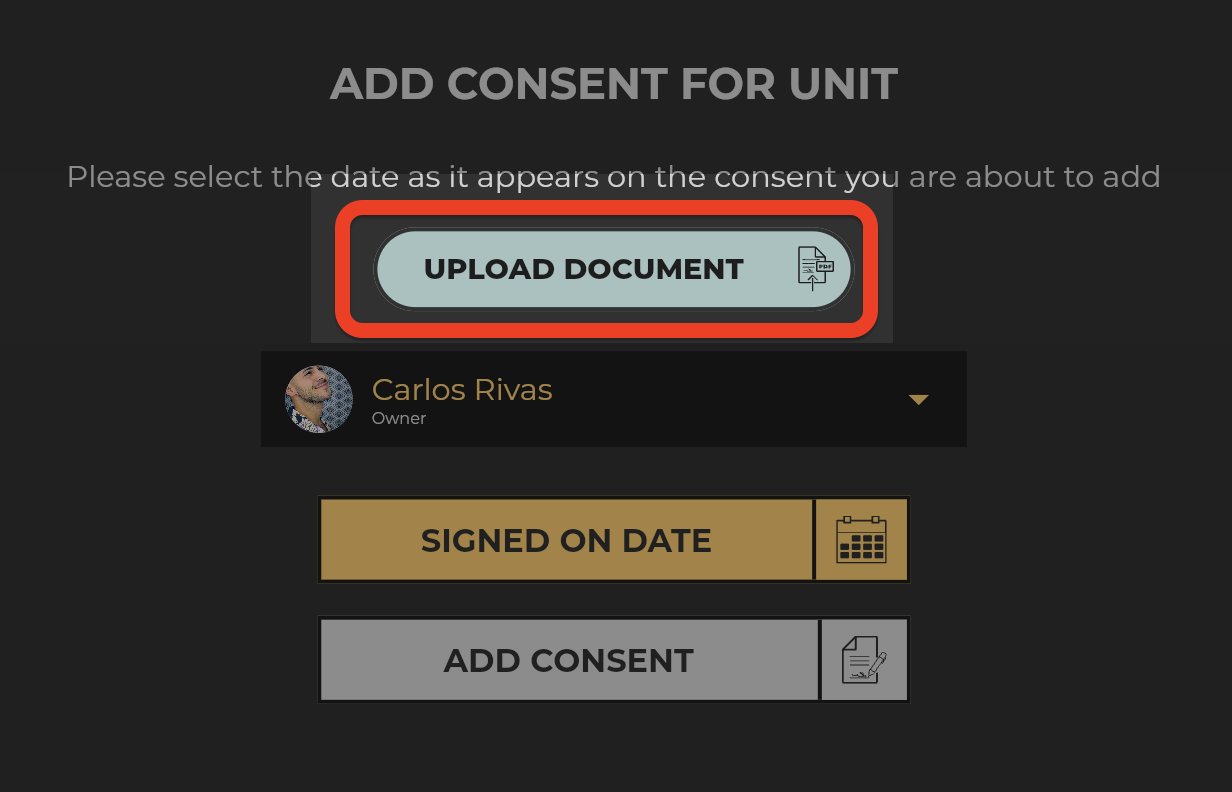
This is not mandatory, and if you wish to solely enter the opt-in date for this unit,
move on to the next step.
➡️
Step 7 - Click the "SIGNED ON DATE" button, which will present a calendar for you, please enter the date the unit owner signed their opt-in consent form for online voting.  ➡️
➡️ 
Step 8 - Final Action: click the "ADD CONSENT" button now that it is enabled. 
Step 9 - Success!: You've successfully enabled the unit for online voting. To exit this screen, simply click "Close (X)" in the top right corner.
For additional assistance or inquiries, feel free to reach out to our
dedicated support team: Get Support