By following these instructions, you will be able to create groups that can be used to publish specific documents and send out electronic notifications to isolated groups.
Groups are a powerful tool for organizing and managing content within your community.
Follow these steps to create a Group:
-
Hover your mouse over the three-building icon or COMMUNITY, then select "GROUPS."

-
Look for the "ADD NEW GROUP" button in the top right corner of the screen and click on it.

-
The next screen will present three required fields that need to be completed (shown below):
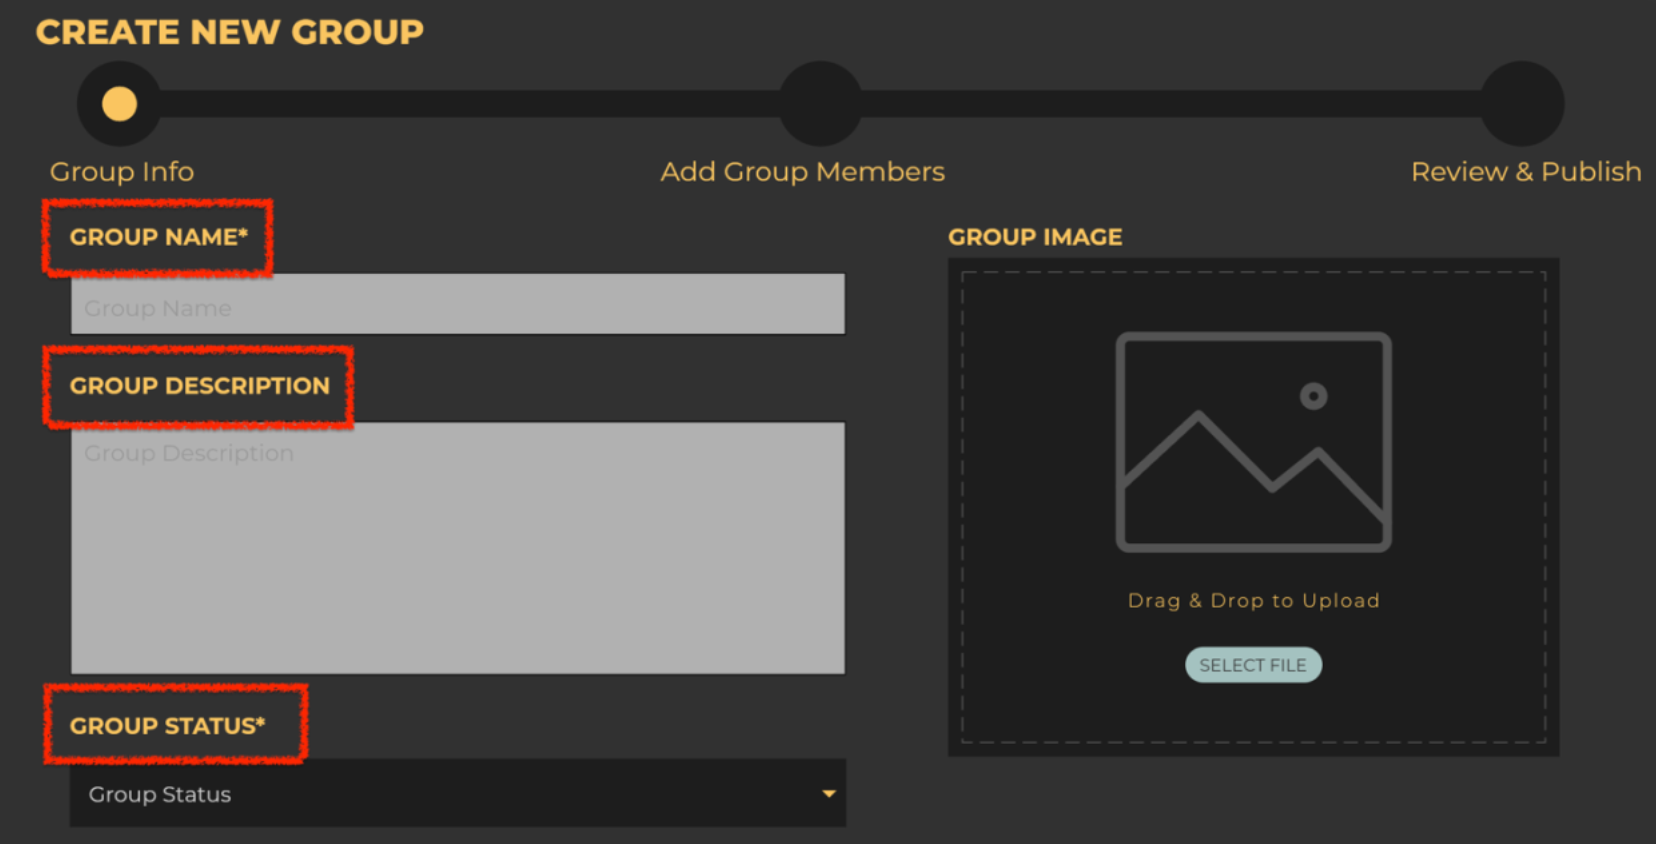
- GROUP NAME: Enter the name of your group.
- GROUP DESCRIPTION: Enter a description of the group. If you don't have one, simply input the Group Name, as you did above.
- GROUP STATUS: Selecting group status will open a menu of options. The most commonly used is HIDDEN, as it will not be visible to anyone except account administrators (shown below).

-
Scroll down and select "Next Step."

-
On the next screen, you can begin adding owners to your group. Start by searching for their names in the "Search by User Name" field box on the left-hand side.

-
For each user you wish to add, click on the circled plus icon next to their name.


-
You will see the names being added to the right-hand side. Continue adding all the users you wish to include in this group.

-
Scroll down and select "Next Step" in the bottom right corner of this screen.

-
The next screen provides a summary of all the options you've selected. To complete the creation of this group, click on "PUBLISH GROUP."

-
Success! You've successfully created your group!

If you have any problems or need additional assistance, don't hesitate to reach out to our dedicated support team at support@onrapp.com