NOTE ON OPT-IN STATUS': If the user you’re adding is an 'Owner' user type and need to be opted-in for online voting for their unit(s), please contact ONR's Support team to add their opt-in status.
ADDITIONAL NOTE: If a user owns multiple units, please assign them one unit when entering their information for the first time, then locate the “Reassign unit to a new user” article in the database. Likewise, if a Resident or Tenant belongs to more units, please use the “Reassign unit to a new user” article.
1. MENU - Select "USERS" on the left side menu bar, within the "COMMUNITY" dropdown list.

2. ADD - Select the "ADD NEW" button in the top right corner of your screen.

3. CREATE - Select "Create Single User".

4. FILL - Enter all fields and select “CREATE USER” in the lower right corner.
Locate the unit you wish to assign the user to from the drop-down list (if you cannot locate the unit, please reach out to ONR support via email to support@onrapp.com)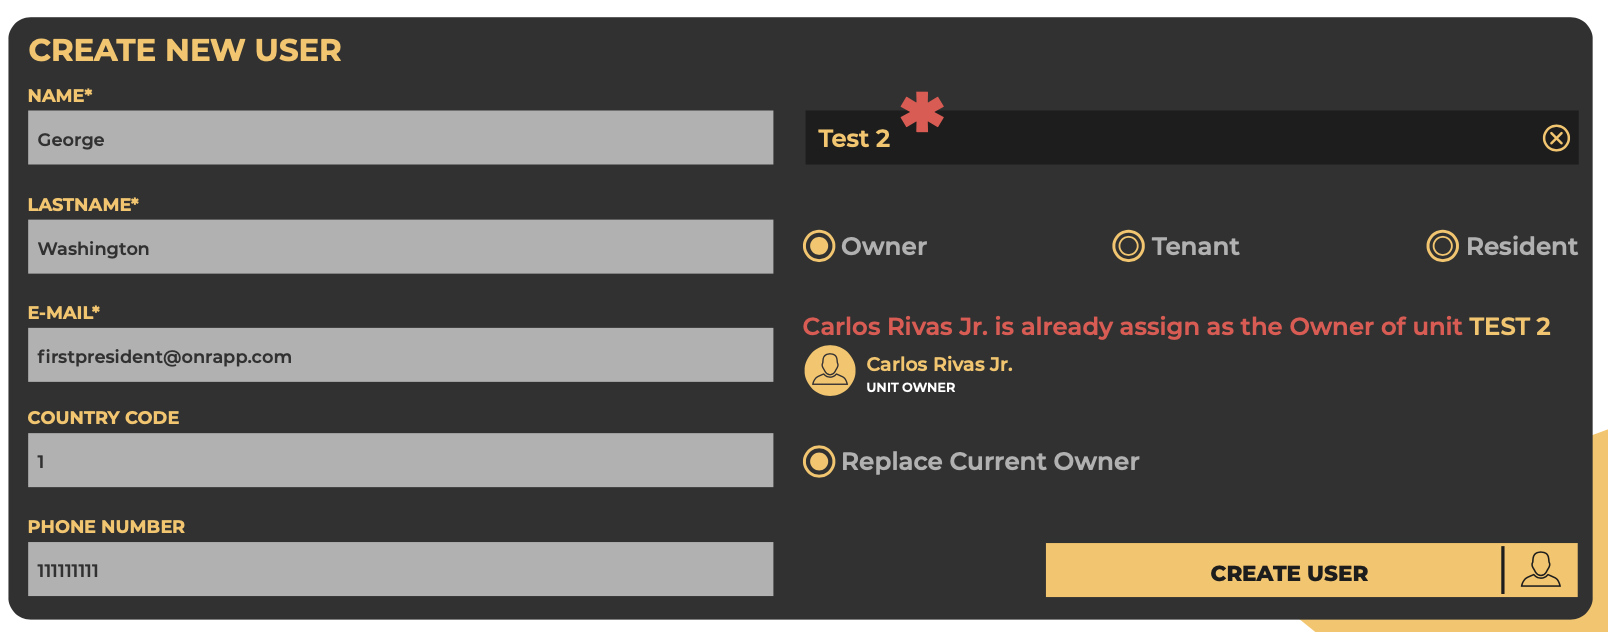
OWNER - Full access + able to view and vote on electoral and non-electoral items. Only one owner user type per unit.
RESIDENT - Full access with the exception of viewing and voting on electoral items. There may be multiple “Resident” user types assigned to a unit.
TENANT - Full access with the exception of viewing and voting on electoral items. Only one tenant user type per unit.
5. SUCCESS!
You’ve now added a new user to the system, they should immediately receive their “Welcome” email allowing them to set their password and log into the community portal.
NOTE: Please ensure they check your spam/junk folders, as these automated emails sometimes land there.

If you have any problems or need additional assistance, don't hesitate to reach out to our dedicated support team at support@onrapp.com